+- Curl Global Community (https://communities.curl.com)
+-- Forum: Tutorials (https://communities.curl.com/forumdisplay.php?fid=3)
+--- Forum: Public Training (https://communities.curl.com/forumdisplay.php?fid=4)
+---- Forum: Curl IDE Made Easy (https://communities.curl.com/forumdisplay.php?fid=6)
+----- Forum: Try 1: Getting to Know Curl with 'Hello Curl' (https://communities.curl.com/forumdisplay.php?fid=9)
+----- Thread: Page 1: Creating a Project (/showthread.php?tid=42)
Page 1: Creating a Project - ashimo - 06-16-2011
 Getting to Know Curl with 'Hello Curl'
In Try 0, we installed the IDE. So, now that the installation is complete, we'll create our first Curl program. We'll write a program that displays "Hello Curl!" in our browser.
Please download Try1.zip file by selecting the following link: Try1.zip.
Unzip the contents to the C:\Curl directory. This is the working directory for all the examples and exercises contained within this tutorial. Note: If C:\Curl has not already been created, you can create it now.
 Start the IDE, and create a new Project
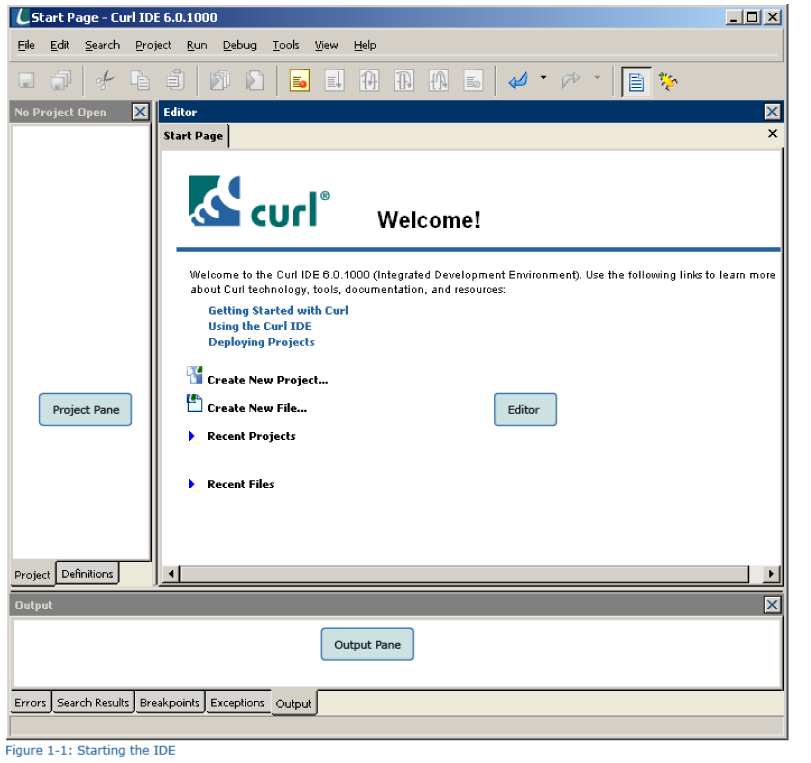
1. To start the IDE, double-click the Curl IDE shortcut that we created on the desktop. Then, the screen shown in Figure 1-1 appears. When the IDE is first started, the screen is divided into a three-pane layout, as shown in the figure. You can rearrange this as you like.
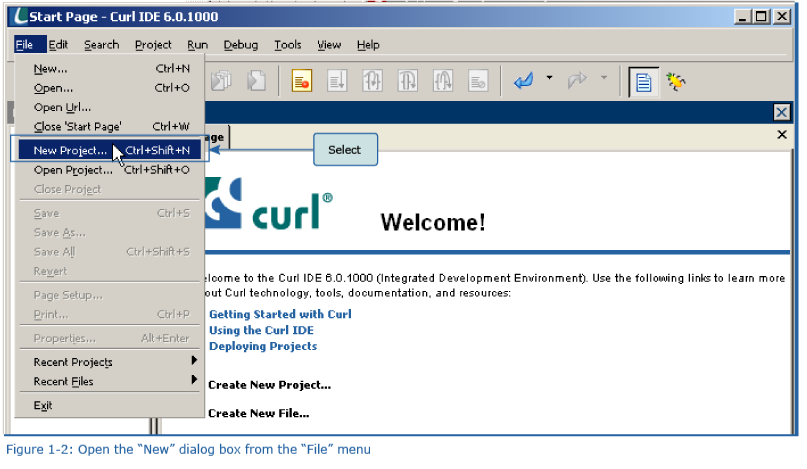
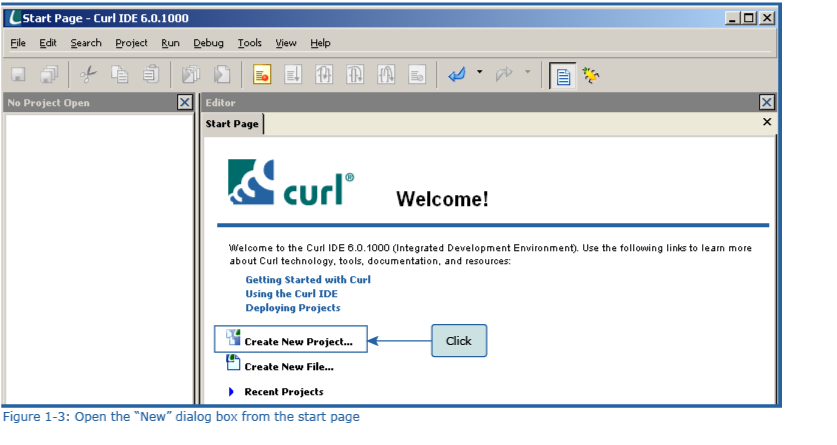
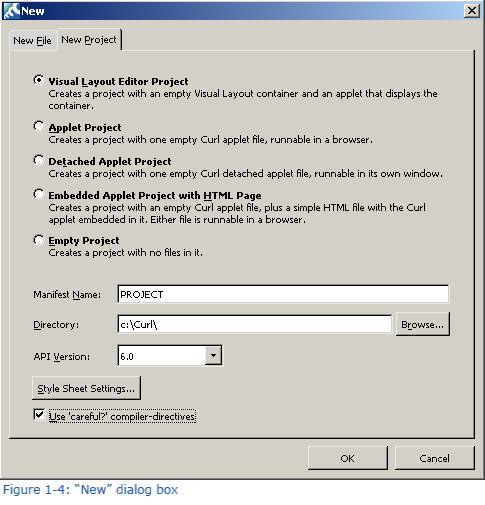
2. From the IDE “File” menu, select “New Project” (Figure 1-2). Or, click “Create New Project” on the start page (Figure 1-3). Then, the “New” dialog box shown in Figure 1-4 appears.
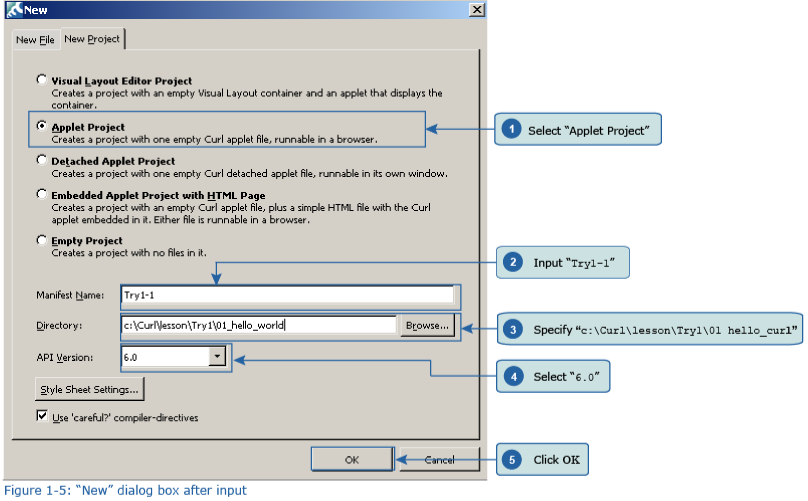
3. Refer to Figure 1-5. Select “Applet Project” (1) and then, in the “Manifest Name” field, enter “Try1-1” (2). In the “Directory” field, specify “c:\Curl\lesson\Try1\01 hello_curl” (3). For an explanation of how to make this specification, see “Specifying a directory for creating a project” in the hint box below. Specify “6.0” for "API Version" (4), and then click "OK" (5).
 Debug Options
Specifying a directory for creating a project
You can specify the directory to be used for creating a project in either of two ways: directly inputting the path or selecting the 'Browse" button.
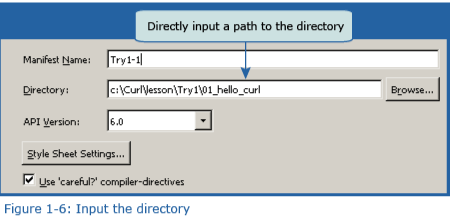
1. Inputting the path to the directory directly into the "Directory" field
Input the path to the directory to be used for project creation directly into the "Directory" field. If you specify a directory that does not yet exist, that directory is automatically created when you create the project.
2. Using the "Browse" button to select a folder
Click the “Browse” button, located next to the “Directory” field. The "Browse for Folder" dialog box appears. Using this dialog box, select the directory in which a project is to be created. For the example given in Step 1, the specified directory has not been created. In such a case, create and specify a directory as described below. After selecting the “Curl” folder, click “Make New Folder.”A folder named “New Folder” is created. Right-click “New Folder,” select “Rename” and then change the folder name to “lesson”. In the same way, create folders named “Try1” and “01_hello_curl”. Then, select “01_hello_curl” and click “OK”.
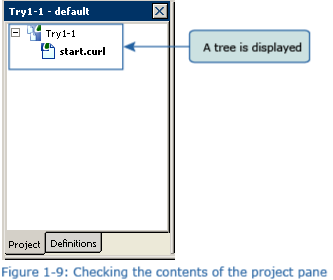
4. The IDE project pane displays a tree like that shown in Figure 1-7. Curl manages related resources in groupings of “Projects.”
