+- Curl Global Community (https://communities.curl.com)
+-- Forum: Tutorials (https://communities.curl.com/forumdisplay.php?fid=3)
+--- Forum: Public Training (https://communities.curl.com/forumdisplay.php?fid=4)
+---- Forum: Curl IDE Made Easy (https://communities.curl.com/forumdisplay.php?fid=6)
+----- Forum: Try 1: Getting to Know Curl with 'Hello Curl' (https://communities.curl.com/forumdisplay.php?fid=9)
+----- Thread: Page 3: Examining the Program Structure of Text Display (/showthread.php?tid=44)
Page 3: Examining the Program Structure of Text Display - ashimo - 06-16-2011
Structure of our created program
So, let’s examine the structure of the program that we just created.

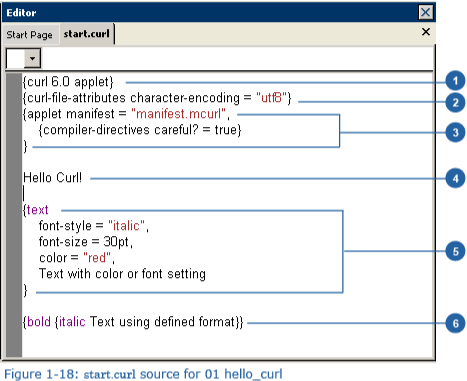
1. Line 1 herald declaration
Code:
curl 6.0 appletThe text on line 1 is known as the “herald declaration.” This describes the version of Curl RTE that will execute this source code, as well as the type of the file.
 Herald Declaration Syntax
The curl expression has the following syntax: {curl api-version-list component-type} where
- api-version-list: a list of API versions that can be used to interpret the page. Use commas to separate version numbers. If a user loads a page into the Curl RTE, it checks to make sure that this installation of the RTE can support at least one of the API versions listed in api-version-list. If the installation is compatible, the RTE loads the file. Otherwise, it throws an error.
- component-type: the type of Curl content. Specify applet for applets; specify package for packages; or specify script for scripts.
2. Line 2 character encoding specification
Code:
{curl-file-attributes character-encoding = utf8}3. Applet declaration
Code:
{applet manifest = manifest.mcurl,

    {compiler-directives careful? = true}

}
On line 3, the locations of the files referenced by this applet, such as the manifest, are specified.
4. Hello Curl!
Code:
Hello Curl!The actual program begins from this point. The parts outside the range defined by the outmost “{“ and “}” are referred to as the “top level.” Any text for which a style is not specified, like "Hello Curl!", is displayed on the browser as is.
5. Text style
Code:
{text

    font-style = italic,

    font-size = 30pt,

    color = red,

    Text with color or font setting

}
With Curl, a style is created by enclosing the text inside “{“ and “}”. The name of the style is specified immediately after “{“ and then, the arguments to which the style is applied are described, separated by “,”.
Style options are specified first in the list of arguments, then followed by the text displayed on the screen.
- CORRECT: {text color = "red", font-size = 15pt, Hello Curl!}
- INCORRECT: {text color = "red", Hello Curl!, font-size = 15pt}
 Arguments
Within a program, the values that are exchanged in a funtion call or similar operation are called arguments. Processing is performed using the exchanged value, and then the result is returned.
Curl, like other languages, supports the nesting of styles. The browser displays text according to this nesting. Note that multiple spaces between text or carriage returns will be displayed as a single space. If we insert a blank line between blocks of text, then those blocks are displayed as separate paragraphs.
Thus, a Curl applet contains a herald declaration, text, and styles.
6. Predefined text styles
Code:
{bold {italic text using defined format}}For text styles that we use frequently, such as bold and italic, we can use pre-defined styles. Style has the same meaning as {text font-weight = "bold" …}.
 IDE Layout
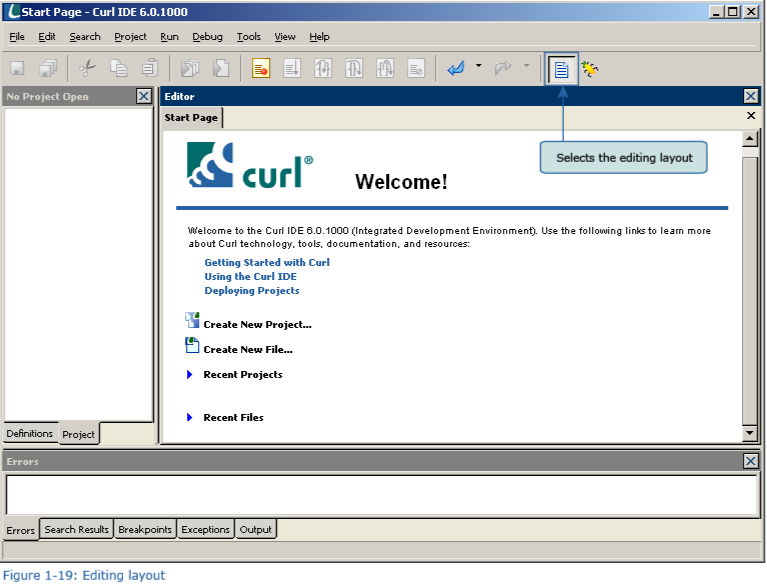
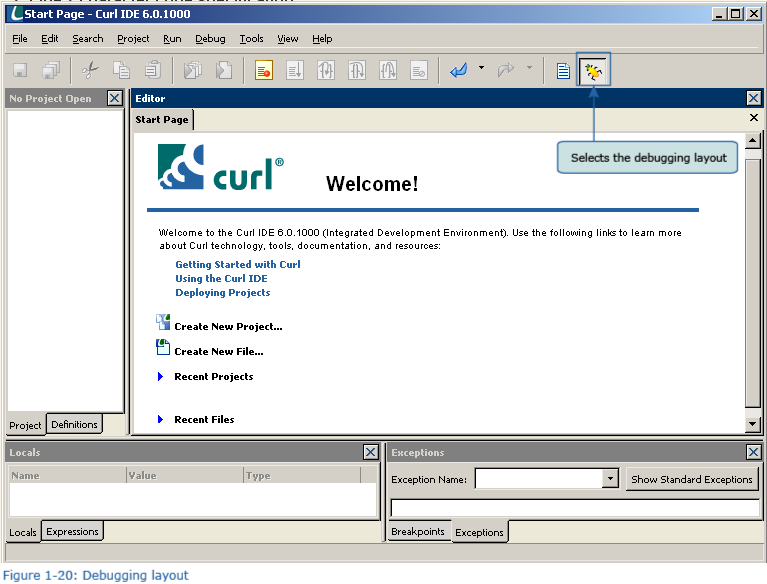
The IDE supports two types of window layouts. One is used for editing, while the other is used for debugging. Each layout consists of panes that are designed specifically for either editing or debugging. The default layout is the editing layout. If an error is detected at run time, however, the layout automatically switches to the debugging layout. Icons on the toolbar can also be used to switch the layout. Each layout can be customized. Once you have changed a layout to suit your needs, you can then save it. To subsequently restore the default layout, go to the IDE “View” menu and then select “Restore Layout” --> “From Default.”


The IDE lets you display several different panes. For example, the following panes are available.