+- Curl Global Community (https://communities.curl.com)
+-- Forum: Tutorials (https://communities.curl.com/forumdisplay.php?fid=3)
+--- Forum: Public Training (https://communities.curl.com/forumdisplay.php?fid=4)
+---- Forum: Curl IDE Made Easy (https://communities.curl.com/forumdisplay.php?fid=6)
+----- Forum: Try 6: Integrating Applications (https://communities.curl.com/forumdisplay.php?fid=14)
+----- Thread: Page 1: Integrating Applications (/showthread.php?tid=79)
Page 1: Integrating Applications - ashimo - 06-20-2011
 Try 6: Integrating Applications
Please download the Try6.zip file by selecting the following link: Try6.zip.
Unzip the contents to the C:\Curl directory. This is the working directory for all the examples and exercises contained within this tutorial. Note: If C:\Curl has not already been created, you can create it now.
In the previous chapters, we’ve simply displayed grids and graphs in our browser. In Try 6, we’ll examine how we can actually arrange the displayed objects on the screen.
 Basics: Integrating multiple pages into a tab container.
 Create the 'Try 6-1' Project
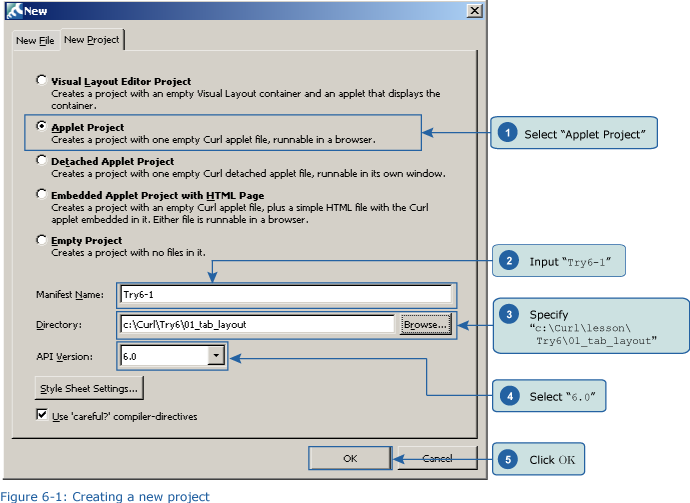
Close the Try 5 project and then, from the IDE 'File' menu, select 'New Project'. In the 'New Project' dialog box, select “Applet Project” (1), input “Try6-1” (2), specify c:\Curl\lesson\Try6\01_tab_layout in the “Directory” field (3), set the API Version to 6.0 (4), and then click OK (5).
 Copying an Image File
Copy the curl_logo.gif file from c:\Curl\try6\01_tab_layout folder to c:\Curl\lesson\Try6\01_tab_layout.
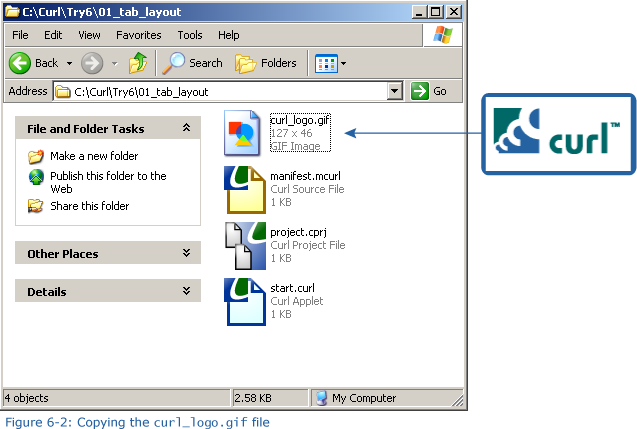
 Inputting the Program
Next, we’ll input the program. You can copy the program code below or use c:\Curl\Try6\01_tab_layout\start.curl and then paste it into the editor in the IDE.
Code:
{value

    let tab-container:TabContainer =

        {TabContainer

            control-color = #EEFFFF,

            {TabPane

                label = Page 1,

                margin = 5pt,

                Contents of Page 1

            },

            {TabPane

                label = Page 2,

                margin = 5pt,

                {image source = {url curl_logo.gif}}


            },

            {TabPane

                label = Page 3,

                margin = 5pt,

                {VBox

                    spacing = 5pt,

                    Display multiple objects using a VBox,

                    {image source = {url curl_logo.gif}}

                }

            }

        }


    tab-container

}
Save the File, and then Execute the Program
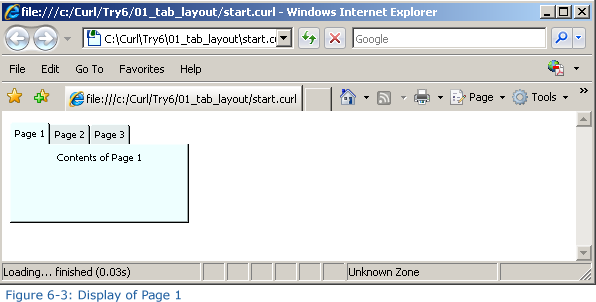
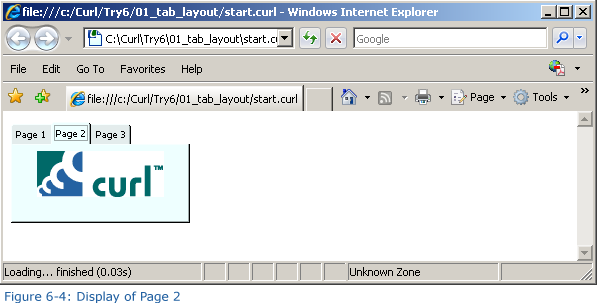
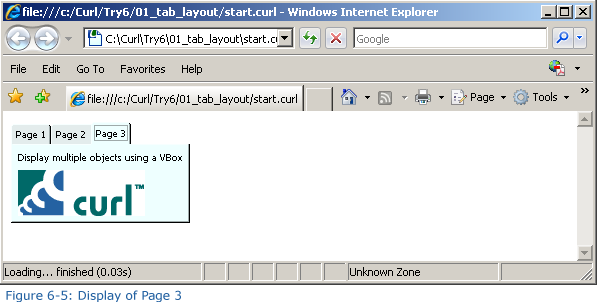
After inputting the code, save the file, and then execute the program. The following result will appear in your browser. Try switching the tabs as shown in Figures 6-3, 6-4, and 6-5.
