
+- Curl Global Community (https://communities.curl.com)
+-- Forum: Tutorials (https://communities.curl.com/forumdisplay.php?fid=3)
+--- Forum: Public Training (https://communities.curl.com/forumdisplay.php?fid=4)
+---- Forum: Curl IDE Made Easy (https://communities.curl.com/forumdisplay.php?fid=6)
+----- Forum: Try 2: Making a Simple Action Game (https://communities.curl.com/forumdisplay.php?fid=10)
+----- Thread: Page 2: Structure of a Program that Displays Values input from Controls (/showthread.php?tid=48)
Page 2: Structure of a Program that Displays Values input from Controls - ashimo - 06-16-2011
 Structure of a program that displays values input from controls
The program covered in this chapter introduces many new elements. We’ll look at these in order.
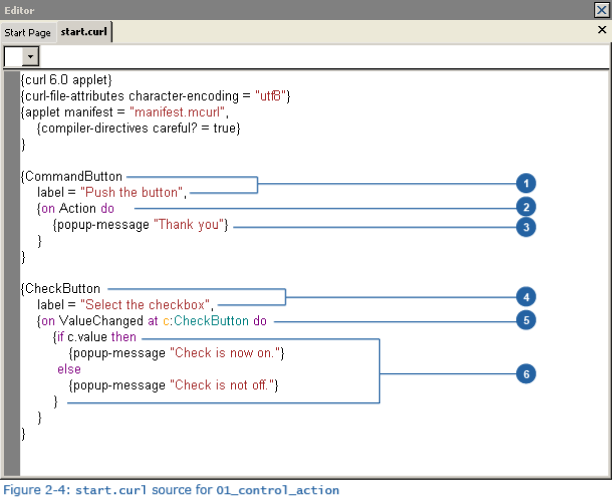
1. Displaying a command button “CommandButton”
Code:
{

    CommandButton

    label = Push the button,

    ...

}
To display a command button in Curl, we use CommandButton. Using an option called label, we can specify the label that is displayed on the CommandButton. In this example, we specified a character string, but just like in Try 1, we could also specify an image file as the label.
In addition to the label option, there is also control-color (used to specify a button color) and style (for specifying the style of the button). Next, change the code as shown below and then check the results.
Code:
{CommandButton

    label = Push the button,

    control-color = green,

    style = rollover

}
Search for CommandButton in the Help, and note the different options that are supported.
 Types of Controls
- Button controls: CommandButton, CheckButton, RadioButton
- Text controls TextDisplay, TextField, PasswordField, TextArea, RichTextArea
- List controls ListBox, DropdownList, ComboBox, ColorDropdown
- Other controls SpinControl, CalendarControl, DateField, ProgressBar, Slider, GroupBox
2. Event handler 'on Action do'
Code:
{on Action do

   ...

}
When a command button is pressed, an event named “Action” is generated. Upon the generation of this event, the {on Action do } code (event handler) is executed.
 Event Handler Definition 1
The following shows the on syntax in the simplest form: {on event-class do body} where
- event-class specifies the class of the event it handles.
- body is the code for the event handler procedure.
3. Display of a pop-up message 'popup-message'
Code:
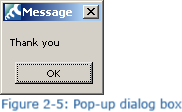
{popup-message “Thank you!”}The popup-message expression is designed to display a popup dialog box.
4. Creating a check button 'CheckButton'
Code:
{CheckButton

    label = Select the check button,

    ...

}
This style is used to create a check button. In the same way as for <font color="purple">CommandButton</font>, a variety of options are supported. Take a look at these in the Help.
5. Event handler 'on ValueChanged at'
Code:
{on ValueChanged at c:CheckButton do ...}Placing a check mark in a box, subsequently removing it, and changing a value all cause a ValueChanged event to be generated. This time, we have an at component to the event handler expression that we did not see in the explanation of the CommandButton event handler. By adding an at after the name of an event, and appending a variable name for the target of the event (in this case CheckButton), we can reference it within the event handler expression. In this example, c is used as the name of the CheckButton that causes the event to occur.
 Event Handler Definition 2
Here is a more general form of the on syntax: {on event-type at target-var[:target-type]do body} where
- target-var\[:target-type\] binds a variable to the target.
- If target-type is not specified, it defaults to any.
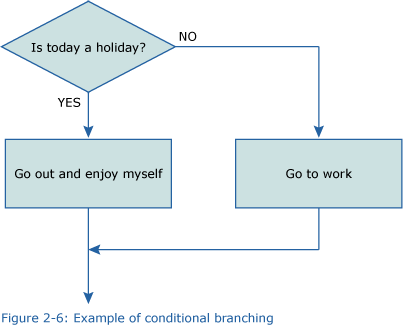
6. Conditional branches beginning with 'if'
Code:
{if c.value then

    {popup-message Check is now on.}

 else

    {popup-message Check is now off.}

}
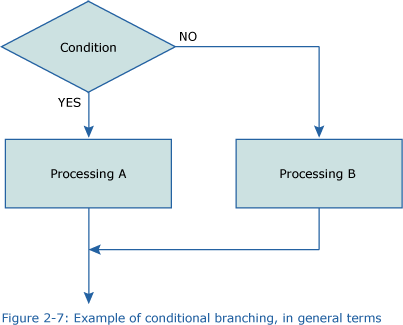
Putting this into more general terms, we get this:
Describing this in Curl produces the following:
Code:
{if condition then

    Processing 1

 else

    Processing 2

}
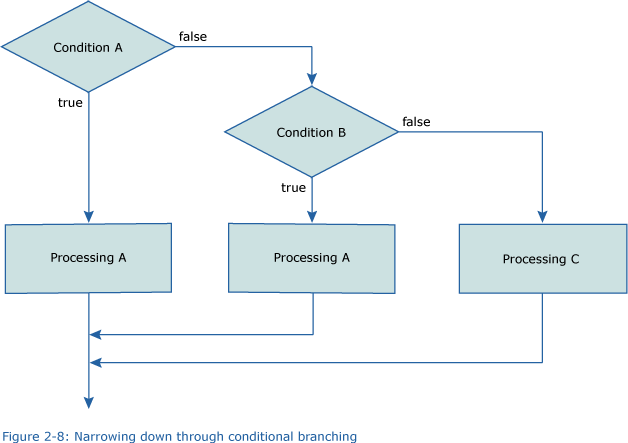
When the condition is false, and we want to test other conditions then we can use elseif to add more branches. This would be described as follows:
Code:
{if condition1 then

    Processing 1

 elseif condition2 then

    Processing 2

    …

 elseif condition n then

    processing n

 else

    processing n+1

}
Figure 2-8 illustrates this structure.
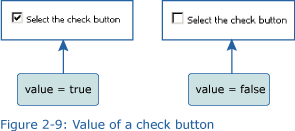
So, let’s apply this conditional branching to our example. As the condition, we code c.value where c represents the check button and c.value lets us acquire the value of the check button. When a check mark is placed in the check button, the value is true, while when there is no check mark, the value is false.
So, when the value of a command button changes, or if a check mark is placed in a check button, a message stating “Check is now on” is displayed. Otherwise, “Check is now off” is displayed.