

Curl Global Community
›
Tutorials
›
Public Training
›
Curl IDE Made Easy
›
Try 6: Integrating Applications
 Page 5: Application: Creating the Screen Layout
Page 5: Application: Creating the Screen Layout
Page 5: Application: Creating the Screen Layout
|
06-20-2011, 01:46 PM,
(This post was last modified: 06-23-2011, 04:33 PM by ashimo.)
|
|||||
|
|||||
Page 5: Application: Creating the Screen Layout
 Application: Creating the Screen Layout Application: Creating the Screen LayoutLet’s use a combination of graphical containers to create a screen layout. We’ll also look at how we can use Curl code that is written in a separate file and access it from within start.curl.  Create the 'Try 6-3' Project Create the 'Try 6-3' ProjectClose the Try 6-2 project and then, from the IDE 'File' menu, select 'New Project'. In the 'New Project' dialog box, select “Applet Project” (1), input “Try6-3” (2), specify c:\Curl\lesson\Try5\03_create_layout_1 in the “Directory” field (3), set the API Version to 6.0 (4), and then click OK (5). 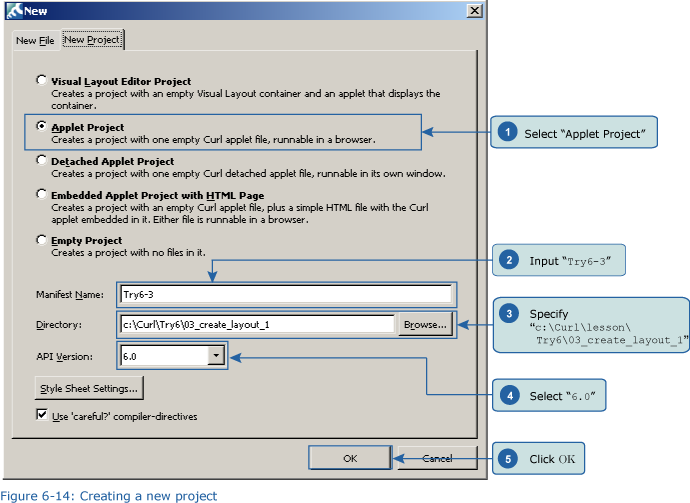  Inputting the Program Inputting the ProgramCopy the curl_logo.gif file from c:\Curl\Try6\03_create_layout_1 and paste it into c:\Curl\lesson\Try6\03_create_layout_1, and then input the following program. You can copy the program code below or use c:\Curl\Try6\03_create_layout_1\start.curl and then paste it into the editor in the IDE. Code: {valueSave the program, and then execute it. Provided no errors occur, the layout is as shown in Figures 6-15 and 6-16, proceed to the next step. 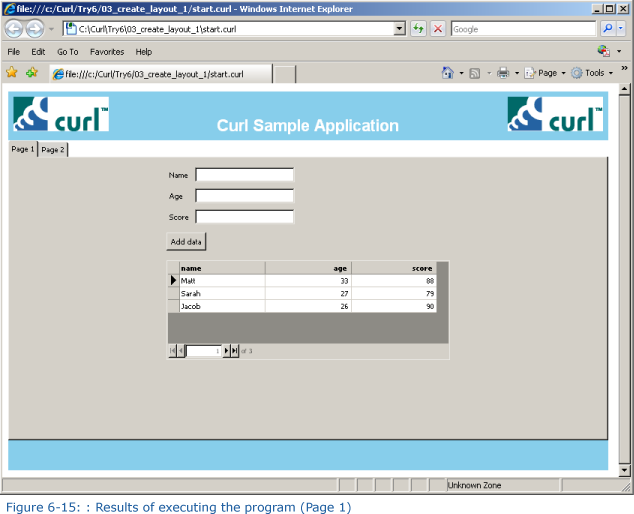 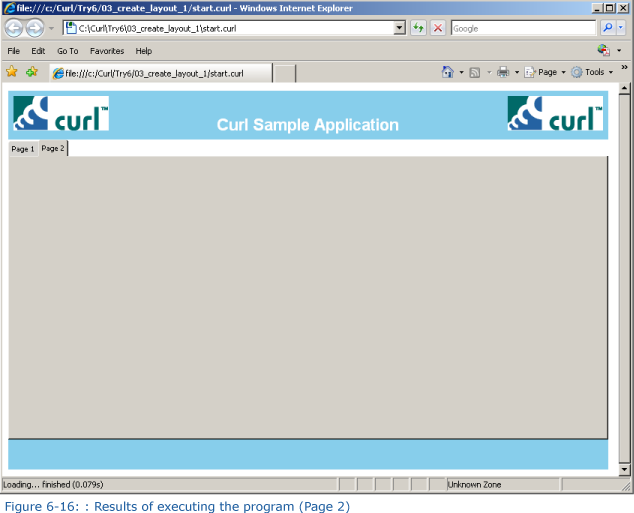  Creating a New File Creating a New FileNext, from the IDE “File” menu, select “New Project.” In the \[New\] dialog box, a \[New File\] tab will be displayed. As shown in Figure 6-18, select \[empty .scurl file\] (1), input make-chart.scurl as the file name (2), specify c:\Curl\lesson\Try6\03create_layout_1 (3), place a check mark in the “Make this file part of the current project” check box (4), and then click \[OK\].  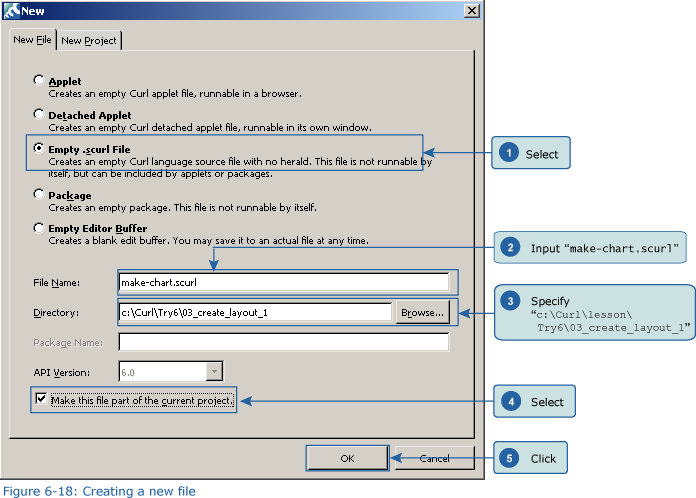 Confirm that this file has been added to the project. Figure 6-20 shows the contents of the file that is added to the project. 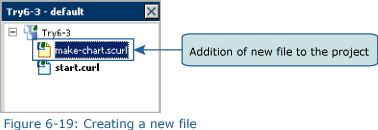 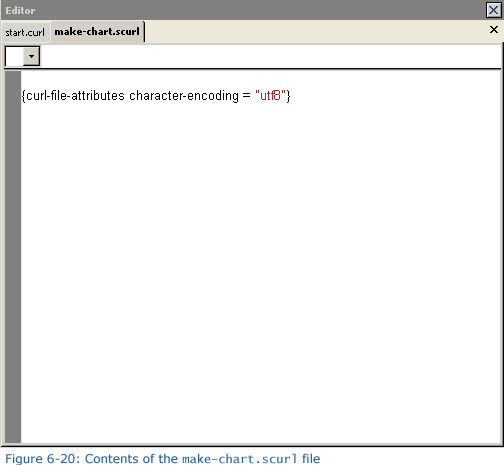  Adding Content to the New File Adding Content to the New FileInput the following content to the make-chart.scurl file. Or, if you prefer, you can copy the content from c:\Curl\Try6\03 create_layout_1\make-chart.scurl and then paste it into the editor. Code: {import * from CURL.GUI.CHARTS} Adding Code to start.curl Adding Code to start.curlOpen the start.curl file using the editor. Add the following source code between the herald declaration and the value expression. Code: {include [color=red]make-chart.scurl[/color]}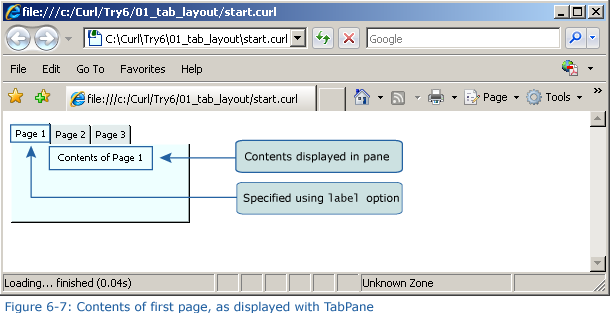 Next, look at the location of the tab-container variable. You’ll see that nothing is included in the second page tab. Immediately after label = ”second page” add a comma (,). After the comma, add the following source code. Code: {make-chart data, type = [color=red]area[/color]}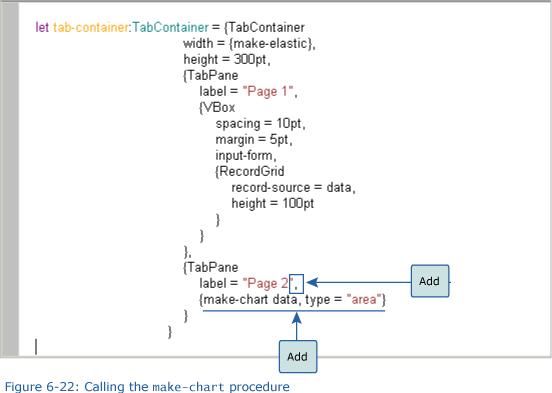  Save the File, and then Execute the Program Save the File, and then Execute the ProgramAfter inputting the code, save the file, and then execute the program. Then, display the second page tab and check that the graph has been added. 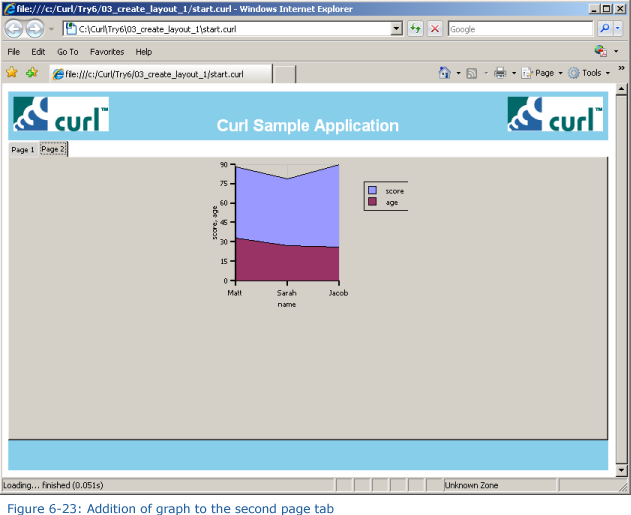 Input a value into the input form on the first page tab (1), and then click the Add data button (2). The input data will be added. 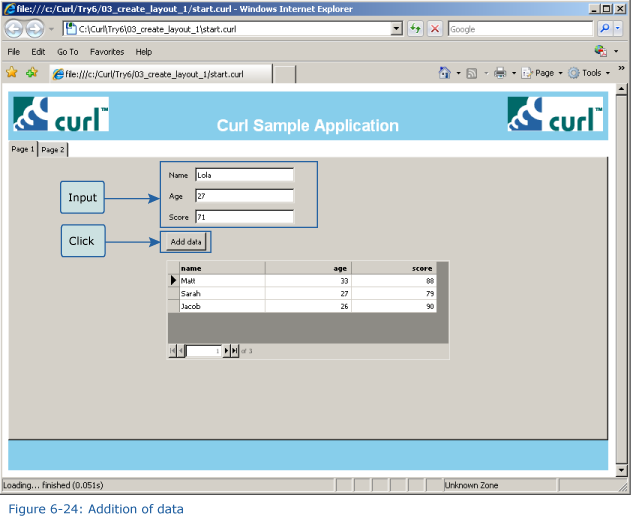 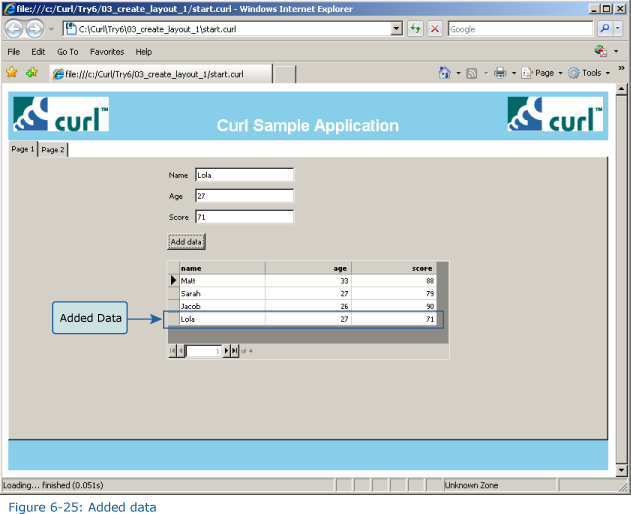 Look at the second page tab. As a result of adding the data, the graph is also modified. 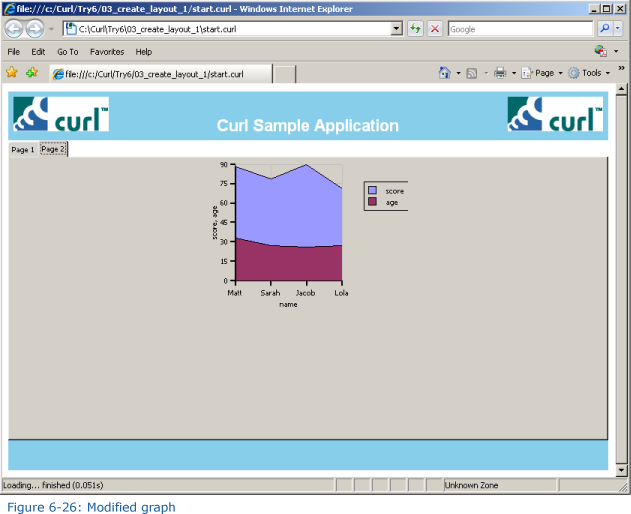
|
|||||


|
« Next Oldest | Next Newest »
|
| Possibly Related Threads... | |||||
| Thread | Author | Replies | Views | Last Post | |
| Page 8: Extra Practice | ashimo | 0 | 3,425 |
06-20-2011, 01:55 PM Last Post: ashimo |
|
| Page 7: Summary | ashimo | 0 | 3,037 |
06-20-2011, 01:51 PM Last Post: ashimo |
|
| Page 6: Structure of a Program that Creates the Screen Layout | ashimo | 0 | 3,305 |
06-20-2011, 01:49 PM Last Post: ashimo |
|
| Page 4: Structure of a Program that uses a Tab Accordion to Create the Layout | ashimo | 0 | 2,951 |
06-20-2011, 01:44 PM Last Post: ashimo |
|
| Page 3: Basics 2: Using a Tab Accordion to Display a Layout | ashimo | 0 | 3,026 |
06-20-2011, 01:43 PM Last Post: ashimo |
|
| Page 2: Structure of a Program that uses Tab Containers | ashimo | 0 | 3,060 |
06-20-2011, 01:41 PM Last Post: ashimo |
|
| Page 1: Integrating Applications | ashimo | 0 | 2,976 |
06-20-2011, 01:39 PM Last Post: ashimo |
|
Users browsing this thread:
2 Guest(s)
2 Guest(s)